FTC:Driver Hub Tutorial
Driver Hub Tutorial
Driver Hub
The Driver Hub is an Android device that has a touch screen and multiple ports for the game controllers and other electronics. The device makes connections between the Control Hub and the Driver Station App much easier. This page makes reference to the Driver Hub.

Home
The home page is the pathway to most things in the Driver Hub. It also contains the dropdown selections for the different autonomous and teleop programs. On the top, the battery percentage for the Driver Hub is displayed. To the right of this, there is the robot’s battery voltage displayed. When this is green the battery is closer to fully charged. When it is yellow or red, the robot battery should probably be switched out. Around 12V is a healthy and charged battery.

Configuration


The robot configuration contains the names of all your electronics and where they are plugged into the REV hubs. The names in this configuration must match the names given to the electronics in the code. If the configuration names don’t match the names in the code, then the code will report an error and will not be able to run.
- Make sure the configuration names match in order to configure the robot.
- Plug the electronics into the Control Hub or Expansion Hub and add them to the configuration on the Driver Hub with the names given to them in the code
- Plug that wire’s motor into a port in the REV Hub
- Configure that motor to that port in the Driver Hub
- Write it in the code. Remember to name it accordingly.
Let’s consider the motor example with the drivetrain motor.
- Plug the motor into motor port 0 of the Control Hub.
- Tap the three dots on the top right
- Select Configure Robot
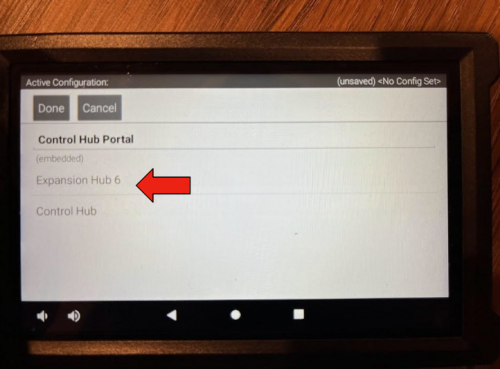
- Tap Control Hub Portal
- Tap Control Hub
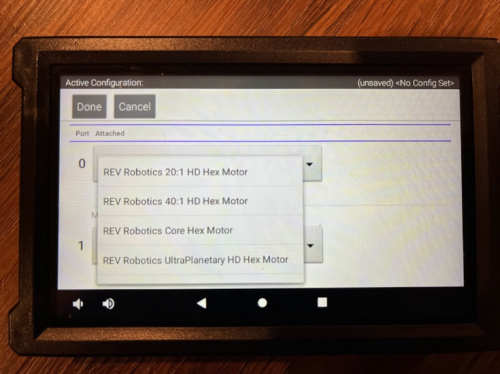
- Tap Motors

- On the top is port zero. Choose the motor that is being used
- Finally, type in the configuration name for that motor that was assigned in the code.


This process needs to be repeated for all the different electronics. The only difference is that for the different types of electronics, that configuration area needs to be selected. For example, instead of going into “Motors”, if a servo needs to be configured, go into “Servos”.
Video Guide
Here is a quick video guide we made to show you how to create a configuration on the Driver Hub.
Settings


There are many different things that can be done in the settings. One of the main things is connecting the Driver Hub to the Control Hub via WiFi Direct.
- In order to connect the two devices go into the 3 dots on the top right
- Then select Settings (Scroll Down)
- Tap Pair With Robot Controller
- Tap WiFi Settings
- There should be a screen that looks like the Android Wifi Settings. From here select the Control Hub name. The Control Hub and Driver Hub should now be connected together.
If they are connected successfully it should display the robot's name in red text. This will be displayed on the “Wifi Settings” page mentioned earlier. Also, make sure the pairing method is set at Control Hub. For non-Driver Hubs, this should be set at Wi-Fi Direct
Some of the other Driver Hub settings are self-explanatory, like the background color, different warnings, and other personalized settings.


Helpful Tips
- If the Driver Hub has some sort of error being displayed in yellow or red sometimes restarting the robot helps to get rid of the errors
- Power cycling the hub (turning it off, waiting 30 seconds, and turning it on again) and the robot can also help with this sometimes
- In settings, there is a page called Driver Inspection Report. This tool shows multiple things necessary for the robot, like Wifi connections and the Driver Station version
- For WiFi Direct, make sure to name the Driver Hub based on Game Manual 1 requirements
- “Each Team MUST “name” their Robot Controller Android device Wi-Fi name with their official FIRST Tech Challenge Team number and –RC (for example, “12345-RC”). Each Team MUST “name” their Driver Station Android device with their official Team number and –DS (for example, 12345-DS). Teams with more than one Driver Station or Robot Controller Android Device must name these devices with the Team number followed by a hyphen then a letter designation beginning with “A” (for example, “12345-A-RC”, “12345-B-RC”).”

